THE OLD SIGN PHILOSOPHER, THOUGHTS FOR THE DAY!
Nothing is certain.....except the past
Eating your words......never causes indigestionXXXXXXXXXXXXXXXXXXXXXXXXXXXXXXXXXXXXXXXXXXXXXXXXX
The weather has been cold but the website has been sizzling. Over 39,xxx website views have been recorded with over 1200 in less than a week. Its hard to believe but over 148,xxx webpages have been viewed with over 5575 in less than a week. Hopefully in the next couple of months, I can learn front page and download a ton of new information. Thanks St. Louis.
xxxxxxxxxxxxxxxxxxxxxxxxxxxxxxxxxxxxxxxxxxxxxxxxxxxxxxxxxxx
Currently, the May/June beetle is flying around neighborhoods in the St. Louis area. The adults are ½ to 1 inch in length and are a reddish-brown to black color. At this time these adults often crash into the sides of houses and into windows. Since the May/June beetle is nocturnal they are active during nighttime hours. The adults will not cause damage to ornamentals unless large numbers of the adults are present. Larvae of these beetles are white grubs, with feeding habits similar to masked chafer and Japanese beetle grubs.
xxxxxxxxxxxxxxxxxxxxxxxxxxxxxxxxxxxxxxxxxxxxxxxxxxxxxxxxxxxxxxxx
THE CONTAINER GARDEN ALTERNATIVETired of spending money on annuals for your containers every spring? Why not use perennials instead? Gardeners and money conscience homeowners everywhere are learning the benefits of container gardening with perennials.
With so many varieties of perennials to choose from for sun and shade, it's now possible to create combinations that are just as appealing and colorful as those made with annuals alone, and the best part is that you don't have to replant them every year. Sure, you can mix an annual or two in your perennial combination pot, but that certainly isn't necessary if you choose your perennials wisely. You'll learn more about plant selection below.
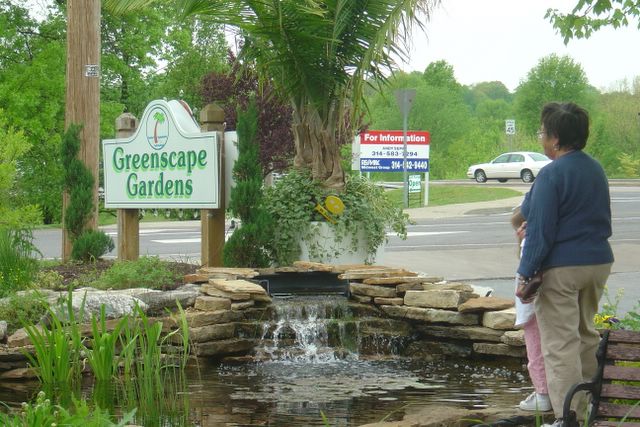
Greenscape Gardens has created some container gardens consisting of perennials and annuals this past year.
WHO would want to grow containerized perennials?Maybe you can identify with the idea of not wanting to spend the time and money on new container plantings every year. But container gardens are also perfect for people who don't have the space for or energy to tend an entire garden. After all, there are far fewer weeds to pull and plants to deadhead in containers! Some of our customers live in apartments and condominiums where container gardening is the only option. Some have physical limitations that prohibit them from getting down and dirty in the garden. For them, bringing the containers up to their level for planting is the best option. In short, container gardening with perennials is for everyone!
WHY would you want to grow perennials in containers?There are many advantages, over and above cost and convenience, to growing perennials in containers. Here are some you might not have considered:
• It gives the gardener a head start of at least a month over those planting only annuals because perennials can handle colder weather. This means that instead of waiting until after Mother's Day to plant up your containers with annuals, you can have beautiful containers in April! If you just have to have annuals in your containers, you can add them after the last frost date.
• It allows the gardener to grow things that wouldn't normally grow in their soil or climate. For example, in St. Louis clay, you can grow perennials that prefer lighter soil in containers and then place the container in your garden. Similarly, if your soil is alkaline, you can grow acid-loving perennials in containers. You can cheat your zone by planting non-hardy or marginally hardy plants in containers and then move them indoors for the winter months. Many gardeners are doing just that since the trend of using tropical plants in the garden began a couple of years ago. You can also use decorative pots to contain perennials that may be invasive in the garden but are still worth growing.
• Containers can be rearranged to give the appearance of continuous bloom throughout the season. Place them in a prominent place, such as on a front porch, when they are in full bloom, then rotate them out when they are finished. If there is a spot in the garden that is all-green during parts of the season, add a pot of flowering perennials there to liven up the space and add visual interest. Design your container plantings to coordinate with the seasons, so you have something in bloom for spring, summer, and fall.
• The container itself can add an architectural element to the garden. Sometimes it's not what you put in the pot that's most important--sometimes it's the pot itself that holds the interest. This is especially true if the container is very large, brightly colored, or uniquely shaped.
WHERE is it appropriate to use containerized perennials?Perennial containers can be used anyplace you would normally use annuals. In fact, perennials offer you more options for the shade because there is a greater number of varieties that will grow there. Say goodbye to impatiens and hello to hostas, coral bells, lamiums, and many, many more perennials!
Before planting up your containers, decide where you want to place them in the yard. This will help you make wiser decisions on the types of plants to include in the pots. Consider where the primary viewing point will be from and design from that angle. Keep in mind that plants in windy locations or those exposed to the hotter afternoon sun will need to be watered more often than those placed in more sheltered, shadier locations.
HOW can I make my own great looking perennial containers?Here's a step-by-step guide to help you through each step of the process, from choosing a container, to knowing which perennials to use, to how to maintain and overwinter them.
Choosing a Container• Just about anything that holds soil can be used as a container. The only requirement is that it has at least one drainage hole. (See the "Drainage" section below for detailed information.) You can use containers made of clay, wood, metal, plastic, or other materials; each material has its advantages and drawbacks. Some experimentation on your part will reveal what works best for you. Plastic is lighter and the soil doesn't dry out as fast, but it isn't always the most aesthetically pleasing choice. Clay containers are attractive, but those that are not painted lose moisture more rapidly than just about any other material. They are also very heavy and cannot be left outside over the winter in northern climates. Imitation clay pots, which are actually made of a sturdy type of foam, are very attractive and lightweight. Many do not come with drainage holes in the bottom, but the material is very easy to drill through so you can make the holes yourself.
• If you are planning on grouping a set of pots, it is more visually pleasing if they are different sizes but have a continuous theme such as pot color or material.
• When it comes to planting perennials in containers, the rule of thumb is the bigger the pot the better. First, perennials have larger root systems than annuals, so they require more space to grow well. Second, perennials in bigger pots have a better chance of overwintering successfully. (Read more about this in the "Overwintering" section below.)
• When choosing a container, try to coordinate the pot type and color with the surroundings it which it will be placed. If you are planning on using the pots in the garden amongst other plants, you may want to use one that is made of a natural material, such as wood, to help it blend in with its surroundings. This takes the focus off the pot and places the emphasis on the plants. Also, try to match the degree of formality of the container with the style of its surroundings. For example, a basket of flowers would look more appropriate on the porch of a cottage style house than would a tall, stately urn. The urn would look better at the entrance to a formal garden.
• If you are trying to create a focal point with your container, you may want to choose one in a bright color and plant it up with foliage plants of a sharply contrasting color (ie. a bright blue pot planted up with chartreuse foliage). If you want it to stand out as an architectural element, choose a large container with an interesting shape that contrasts with its surroundings (ie. a tall, narrow container placed beside a round, mounded plant).
Drainage • Good drainage is absolutely essential for your containerized perennials unless you are trying to create a water garden. Any container you use must have at least one drainage hole. If the pot you choose does not have a hole in the bottom, make one yourself with a drill (there are special bits that can cut into just about any material) or don't use it.
• Before you fill the container with soil, it's a good idea to follow these steps:
1. Screen the drainage holes so the soil doesn't fall out of the bottom of the pot. Some materials that work well for this include landscape fabric (trim to fit bottom of pot) or self-adhesive fiberglass drywall joint tape. The tape comes in a roll; just cut a square to fit over the hole.
2. Add a drainage layer to the bottom of the container. Some people like to use pea gravel or pottery shards for this. A mesh bag filled with styrofoam peanuts works just as well and is much lighter. This might work better for you if you plan on moving your containers around the yard.
Choosing a Potting Soil • Any good potting soil can be used with containerized perennials. Not all potting soil is created equally, though, and with this item you usually get what you pay for. If a bag of potting soil feels just as heavy as a bag of topsoil, it's not what you want. Potting soil should be lighter. Miracle Grow makes an excellent potting mix with the fertilizer already mixed in, which is great for gardeners who don't like to spend the time or money on fertilizing. If you are using plants that prefer to grow in sand or scree, you'll need to make those accommodations.
• Test the pH of the soil. Meters that measure pH are easy to use and are available at most nurseries. The $12 or so purchase is a good investment. This meter will measure the degree of acidity or alkalinity of your soil.
---Acid loving plants need soil with a pH lower than 6.5.
---Alkaline loving plants need soil with a pH higher than 7.5.
---Those that prefer neutral soil like it between 6.5 and 7.5.
• It is important to know what kind of soil the perennials yo u are using in your containers prefer. If your soil is not in the correct pH range, the plant will not grow well if it grows at all. To make soil more acidic (to lower the pH), add aluminum sulphate or garden sulphur to the soil. To make the soil more alkaline (to raise the pH), add lime to the soil.
• Since daily watering slowly flushes the nutrients out of the soil, it's a good idea to supplement with small amounts of liquid fertilizer a couple of months after potting up the containers. You will know it's time to add fertilizer when your normally healthy plants begin to show signs of decline (leaves will appear light green or slightly yellow).
Plant SelectionBefore we get into the design principles of container plantings, let's first talk about selecting plants based on their cultural preferences. Most of all, the plants you use have to work together, not just look good together. This means that you will need to pair varieties with similar cultural needs if they are going to be able to grow in the same container. First, pair shade loving perennials with other shade lovers, not with those that prefer sun. Second, pay attention to the type of soil that each plant likes. Important factors include type of soil (sandy v. those rich in humus), pH (acid v. alkaline), and moisture (dry v. moist).
Combine only those perennials that enjoy the same cultural requirements and you will have beautiful, hassle-free containers. If you want to grow plants with differing requirements, you can do so, but in separate pots.
The choice of plant material is critical to good design when working in small spaces like containers. Pay particular attention to foliage color, texture, and habit first, and then select plants for their flower color, size, form, and bloom time second. When working with perennials, understand that the flowers are a secondary point of interest because, unlike annuals, they appear only for a limited amount of time. A well-designed perennial container will look great even when the plants are not in bloom.
A landscape designer on Home and Garden television said it best when he said you should design the garden based on "Thrillers, Fillers, and Spillers". This is a handy way to remember the three types of plants essential to good design. "Thrillers" are the plants that command attention, like the tall spike in the center of a pot of geraniums. With perennials, since the blooms are not typically present for a long period, thrillers are usually plants with interesting architectural shape or colored foliage. "Spillers" are the plants that typically spill over the sides of the container, visually blending the container and its contents into one. "Fillers" are the plants that take up the space between the thrillers and the spillers. They typically make the planting look fuller and more finished.
Your container garden can include all three of these design elements (thrillers, fillers, and spillers) or you may choose instead to plant up your container with only one type of plant. Not every container you plant needs to have a combination of different varieties. For greater visual interest, you should include a pot or two of a single plant. For example, a single mature hosta in a large pot is stunning, especially when surrounded by containers of combination plantings.
Some practical considerations to keep in mind when choosing plants for containers:
• Compact, mounding or clumping plants typically grow better in containers than spreading ones. Those that spread will outgrow their container and require transplanting sooner than the clumping types.
• Because of root constraints, most perennials (especially the larger ones) will not grow to their mature size in a container like they would in the ground. For instance, a plant that would grow 3 feet tall in the garden may only get half as tall in a container. So if you would like your container to look really full the first year, start with more mature plants to begin with.
• Shade plantings rely heavily on interesting foliage because they typically do not bloom as long as their sunny counterparts. Design first for foliage, leaving the flowers for secondary interest. This is a good place to use plants with strong architectural interest.
• If you are planning on overwintering your container outdoors or in an unheated area, choose plants that are very hardy in your area (ie. ones that are two or more zones hardier than your zone) to increase their chances of overwintering successfully. (See below for detailed information on overwintering and for a list of perennials that typically overwinter well in containers.)
How to Plant the Container 1. Start with a clean container. Be sure to disinfect previously used pots with a mild bleach solution.
2. You'll want the finished planting depth of your plants to be the same as it was in the pots they were grown in originally. Keep this depth in mind as you start to fill the container with soil.
3. When planting the design, it's often easiest to place the "thriller", or focal plant, first and then add the "fillers" second. Tuck in the "spillers" around the edges of the container last.
4. If the plants you are using have become root bound in their original pots, you'll need to gently tease the roots apart so they will be able to spread out in their new container. If the root ball is a solid mass, make a few vertical slits in it with a knife and splay it out in the new container. (It's best to buy plants that are not pot bound in the first place!)
5. Be sure to leave about one inch of space between the soil line and the top of the container so the soil doesn't wash out when you water the plants.
6. Press the soil firmly around the roots to eliminate any large air pockets and then water thoroughly.
Watering • Plants in containers generally need to be watered more frequently than those in the ground. Most will need to be watered daily, some even more often if the weather is particularly sunny or windy. Also, as discussed under "Choosing a Container" above, the material the pot is made of will have an effect on how often the plants need to be watered.
• When watering, do not simply place the hose or watering wand over the pot and sprinkle. This is a very inefficient method of watering because much of the water never reaches the soil. Instead, stick the hose or wand in the pot at soil level. Use a gentle stream of water, not full power, or the soil will be washed out of the container.
• When watering, it is beneficial to let approximately 10% of the water flush through the pot after the plant has had a good drink. This helps to dissolve and wash away any build up of salts in the soil, a common problem in containers. Too much salt in the soil can kill the plants.
• Regular morning watering is best. This allows the plants to dry out before nightfall, avoiding potential disease issues. Regularity is very important. Plants will not grow as well if they allowed to dry out completely between waterings. Potting soil is often difficult to re-wet once it has been allowed to dry out, making it impossible for it to provide moisture for the roots.
Maintenance and Grooming• To maintain their best appearance and to promote rebloom, keep the plants deadheaded (remove spent blossoms). Also, remove any yellowing or dead foliage as soon as it appears.
• Once plants have been growing in the same pot for several months, some of the nutrients in the soil will have been washed away. Supplement with a weak solution of liquid fertilizer every 3-4 weeks to keep your plants healthy and happy.
• It's a good idea to repot containerized perennials each spring. Give them fresh, nutrient-packed soil with some slow-release fertilizer mixed in and they will reward you with vigorous, healthy new growth. This is also a good time to divide any plants that have grown too large for the container and either repot them into a larger one or plant them in the garden.
Overwintering Containerized PerennialsChances are, if you have taken the time to design, plant, and tend your perennial container garden all season long, you are going to want to overwinter it. Some gardeners choose to treat perennials like annuals, however, and simply toss them out after the season is over. Others choose to transplant their containerized perennials into the garden for the winter and then start over fresh with new plants in the spring. The choice is yours. If you'd like to try overwintering, read on.
Why do containerized perennials require special treatment to overwinter successfully?
• Temperature fluctuations are greater above ground than below it, and perennials do not like this.
• Perennials are less cold-hardy when grown in containers, so there is a greater chance for injury.
• Keep in mind that the bigger the pot, the higher success rate you will have in overwintering. This is because there is a larger volume of soil in a bigger pot to help insulate the roots, protecting them from freezing and desiccating.
• In warmer climates or those with a reliable, thick layer of snow cover, perennials are generally easier to overwinter. In the north and in places with unreliable snow cover, it requires more work to get them to pull through the winter.
Regardless of your climate, containerized perennials should be watered thoroughly just before the ground freezes to give them a reserve supply to use during warm winter spells. You can also add a few handfuls of snow to the top of the container occasionally throughout the winter (if overwintering under cover); this will provide supplemental water for the plants if the temperatures rise enough for it to melt.
This said, many containerized perennials do not survive the winter because they get too much water and they drown. When the pot accumulates water at the top but the soil is still frozen at the bottom, the roots sit in water until the soil thaws all the way through and the water can escape through the drainage hole at the bottom. Roots hate to sit in water, especially freezing cold water in winter. Avoid this scenario by overwintering your containerized perennials tipped on their side so water cannot accumulate at the top of the pot, or overwinter them under cover where they will not receive much water during winter or early spring before the soil thaws.
Overwintering Techniques:There are many differing opinions on how to best overwinter containerized perennials. Some of the methods described here may work for your climate while others may not. Trial and error is the best way to find out what will work best for you.
• The general consensus seems to be that the best way to overwinter containerized perennials is to take the entire pot and bury it in the ground. This way, the roots are protected like they would be if the plants were actually planted in the garden. Just be sure not to leave the pot in the ground too long in the spring or the roots will start to grow out the drainage holes, anchoring the pot into the ground.
• You can overwinter them by moving the pots into a cold frame or unheated garage for the winter after the first hard frost. Since all perennials require a period of dormancy or a cold treatment to bloom, don't overwinter them in a greenhouse or other warm place where they will not go dormant.
• If you are overwintering your containers outside, place a grouping of pots as close together as possible in a sheltered site on the ground. This way, the pots can absorb the heat and moisture from the soil. The east side of the house typically is a good spot. Do not overwinter the containers on pavement or any other surface (such as a deck) raised above ground level.
Containerized perennials left exposed on higher levels during the winter have little chance of overwintering successfully.
• You'll need to cover the pots with some sort of insulating material. Try mounding leaves or evergreen boughs on top of the pots, followed by a thick layer of snow. If snow is not reliable in your area, use an insulating blanket made expressly for this purpose. You can also try wrapping the pots themselves in some sort of insulating material for extra protection.
Perennials That Typically Overwinter Well in ContainersAchillea (Yarrow)
Ajuga (Bugleweed)
Alchemilla (Lady's Mantle)
Armeria (Common Thrift, Sea Pink)
Aster
Bergenia (Heartleaf Bergenia, Pig Squeak)
Brunnera
Campanula (Bellflower)
Cerastium (Snow in Summer)
Clematis
Coreopsis (Tickseed)
Dendranthema (Hardy Garden Mum)
Dianthus (Pinks)
Echinacea (Coneflower)
Ferns
Geranium-Hardy (Cranesbill)
Hemerocallis (Daylily)
Heuchera (Coral Bells)
Heucherella (Foamy Bells)
Hosta
Houttuynia (Chameleon Plant)
Iris ensata (Japanese Iris)
Lamium
Lysimachia nummularia (Creeping Jenny, Moneywort)
Lysimachia punctata (Variegated Loosestrife)
Myosotis (Forget-Me-Not)
Phlox subulata (Creeping Phlox)
Polemonium (Jacob's Ladder)
Primula (Primrose)
Pulmonaria (Lungwort, Bethlehem Sage)
Salvia-Perennial
Scabiosa (Pincushion Flower)
Sedum (Stonecrop)
Sempervivum (Hen & Chicks)
Thymus (Creeping Thyme)
Tiarella (Foamflower)
Tradescantia (Spiderwort)
Perennial Combination Container Ideas
Made for the Shade #1
A. Aquilegia 'Blue Shades' (Columbine)
B. Asarum splendens (Chinese Wild Ginger)
C. Astilbe 'Rock and Roll' PP14855
D. Carex m. 'Ice Dance' (Variegated Sedge)
E. Heuchera 'Gypsy Dancer' PPAF (Coral Bells)
Made for the Shade #2
A. Helleborus 'Blackthorn Strain' (Lenten Rose)
B. Corydalis sempervirens
C. Hedera h. 'Golden Ingot' (English Ivy)
D. Aquilegia v. 'Black Barlow' (Columbine)
E. Hosta 'Touch of Class' PP13080
F. Lysimachia nummularia (Moneywort or Creeping Jenny)
Made for the Shade #3
A. Hosta 'Ice Follies' PPAF
B. Athyrium n. 'Red Beauty' (Japanese Painted Fern)
C. Astilbe 'Elisabeth van Veen'
D. Tiarella 'Pirate's Patch' PPAF (Foamflower)
E. Liriope m. 'Big Blue' (Blue Lily-turf)
Made for the Shade #4--Emphasis on Foliage
A. Carex m. 'Oehme' (Variegated Palm Sedge)
B. Athyrium filix-femina (Lady Fern)
C. Pulmonaria 'Raspberry Splash' (Lungwort or Bethlehem Sage)
D. Vinca 'Dart's Blue' (Periwinkle, Myrtle)
Consistently Moist Soil & Part Shade
A. Carex m. 'Oehme' (Variegated Palm Sedge)
B. Ligularia t. 'Cristata'
C. Corydalis lutea
D. Hosta 'Lakeside Looking Glass'
E. Lysimachia n. 'Aurea' (Moneywort or Creeping Jenny)
Late Spring Bloomers--Full Sun or Light Shade
A. Delphinium g. 'Blue Butterfly' (Dwarf Delphinium)
B. Dianthus b. 'Rose Magic' Amazon Series (Perennial Sweet William)
C. Polemonium r. 'Stairway to Heaven' PPAF (Variegated Jacob's Ladder)
D. Heuchera 'Sparkling Burgundy' PPAF (Coral Bells)
E. Veronica u. 'Georgia Blue' (Creeping Veronica)
F. Salvia p. 'Rose Rhapsody' (Meadow Sage)
Red, White, & Blue Combination with Trellis
A. Clematis (red)
B. Clematis (blue or purple)
C. Tanacetum n. 'Jackpot' (White Tansy)
D. Geum f. p.'Blazing Sunset' (Avens)
E. Geranium 'Brookside' (Hardy Geranium or Cranesbill)
F. Cerastium t. 'Yo Yo' (Snow in Summer)
Fall Bloomers--Full Sun & Average Soil
A. Aconitum fischeri (Azure Monkshood)
B. Aster d. 'Wood's Purple' (New York Aster)
C. Caryopteris d. 'Snow Fairy' (Blue Mist Shrub)
D. Echinacea p. 'Ruby Giant' (Purple Coneflower)
E. Lamium m. 'Orchid Frost' PP11122
Combination for a Dry, Sunny Space
A. Agastache 'Black Adder' (Anise Hyssop)
B. Belamcanda c. 'Hello Yellow' (Blackberry Lily)
C. Calamintha n. 'Blue Cloud' (Calamint)
D. Delosperma congestum (Ice Plant)
E. Dianthus 'Bewitched' PP13159 (Pinks)
No Maintenance Container--Full Sun & Dry Soil
A. Verbascum 'Sunshine Spires' PPAF (Mullein)
B. Stokesia l. 'Honeysong Purple' (Stokes' Aster)
C. Sempervivum 'Purple Beauty' (Hen & Chicks)
D. Sagina subulata (Irish Moss)
E. Sedum 'Rosy Glow' (Stonecrop)
Attracts Butterflies--Full Sun & Average Soil
A. Coreopsis p. 'Sunshine Superman' (Star Tickseed)
B. Leucanthemum s. 'Highland White Dream' (Shasta Daisy)
C. Liriope m. 'Silvery Sunproof' (Lily-turf)
D. Lobelia s. 'Fan Scarlet' (Cardinal Flower)
E. Lysimachia nummularia (Moneywort or Creeping Jenny)
Pink Monochromatic Combination--Full Sun
A. Sedum s. 'Brilliant' (Showy Stonecrop)
B. Gaura l. 'Passionate Rainbow' PPAF (Wand Flower)
C. Hemerocallis 'Dark and Handsome' (Daylily)
D. Scabiosa c. n. 'Pincushion Pink' (Dwarf Pincushion Flower)
E. Heuchera 'Green Spice' (Coral Bells)
Herb Pot--Full Sun
A. Lavandula a. 'Dwarf Blue' (English Lavender)
B. Artemisia d. 'Sativa' (True French Tarragon)
C. Teucrium c. 'Summer Sunshine' (Germander)
D. Thymus p. 'Coccineus' (Red Creeping Thyme)
Native Roots--Full Sun
A. Echinacea 'Twilight' PPAF, Big Sky TM Series (Coneflower)
B. Gaura l. 'Whirling Butterflies' (Wand Flower)
C. Heuchera 'Black Beauty' PP13288 (Coral Bells)
D. Asclepias tuberosa (Butterfly Weed)
E. Nepeta 'Kit Cat' (Catmint)
Mini Water Garden--Constantly Wet Soil
A. Juncus e. 'Frenzy' (Variegated Corkscrew Rush)
B. Hibiscus m. 'Mallow Marvels' (Rose Mallow)
C. Acorus g. 'Golden Pheasant' PPAF (Sweet Flag)
D. Asclepias i. 'Cinderella' (Swamp Milkweed)
E. Iris ensata (Japanese Iris)


 Posts
Posts